🔥 Why This Matters (Read This First)
Most of us work like this:
We read articles
We skim documentation
We take scattered notes
We try to piece things together
Then we start building training
The problem:
👉 We lose most of what we learn
👉 We repeat research every time
👉 We manually connect everything
💡 What This System Does Instead
This system:
Turns your research into structured knowledge
Connects ideas automatically
Lets you ask questions against your own content
Saves every answer so it builds over time
🧠 The Big Idea
You are not just taking notes.
You are building a system that gets smarter every time you use it.
🔁 How It Works
You add articles, docs, notes
AI turns them into structured knowledge
You ask questions
AI generates answers based on YOUR sources
Those answers get saved and improve future answers
👉 It gets smarter every time you use it
🆚 How This Is Different from NotebookLM
NotebookLM:
You upload documents
You ask questions
You get answers
This system:
Builds a structured knowledge base
Connects ideas across everything
Saves outputs permanently
Improves over time
👉 It’s not just answering questions
👉 It’s building a brain
🧱 Phase 1: Setup Your Second Brain
🎯 Goal
By the end of this section, you will:
Have Obsidian installed
Have Codex Desktop installed
Have a vault (folder) created
Have Codex connected to that vault
Be ready to start building your second brain
🧠 What You’re Doing (Simple)
You are creating:
👉 A folder (your brain)
👉 Obsidian (to view it)
👉 Codex (to build and think with it)
Step 1: Install Obsidian
Go to: https://obsidian.md
Click Download
Install it like any normal app
Open Obsidian
Step 2: Create Your Vault (Your “Brain”)
This is the most important step.
Option A (Recommended – simplest)
On your computer, create a new folder on your Desktop:
Open Obsidian
Click “Open folder as vault”
Select your Obsidian Vault folder

✅ You now have your vault
🧠 What just happened
That folder is now:
👉 your entire knowledge system
Everything lives there:
notes
sources
AI outputs
Step 3: Install Codex Desktop
Download Codex Desktop
Install it
Open Codex
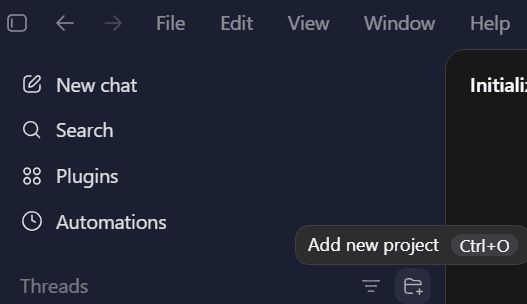
Step 4: Connect Codex to Your Vault
When Codex opens:
Click "Add new project"
Select your:
✅ Now Codex can:
read your files
create new files
update your knowledge base
🧠 What just happened
You connected:
Codex → your vault (brain)
Obsidian → your vault (viewer)
So now:
👉 Codex writes
👉 Obsidian displays
⚙️ Before You Start Using Codex
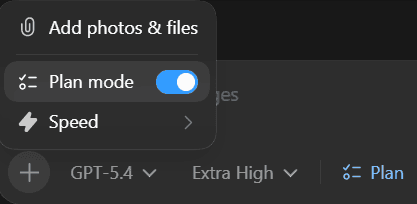
Before running your first prompt, set Codex to:
Model: Best available
Effort: Medium
Mode: Planning (Shift+Tab)
🧠 Why This Matters
Planning Mode helps Codex follow multi-step instructions more reliably.
Step 5: Initialize Your Knowledge Base
Now we let Codex build your structure for you.
👉 Paste this into Codex:
Step 6: Add System Rules
👉 Paste this into Codex:
✅ You’re Done with Setup
At this point, you have:
A vault (your brain)
A structure for organizing knowledge
Codex connected and ready
Obsidian showing everything
🧠 What You Just Built
A system where AI can read, write, and improve your knowledge over time.
👉 Next Step
Now you’re ready to:
👉 Add sources
👉 Process them
👉 Start asking questions
🧠 Phase 2: Add and Process Research
Step 7: Add Your First Sources
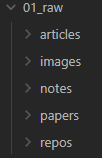
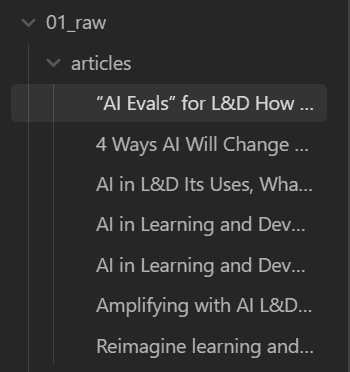
You can add content in two ways to 01_Raw folder.
Use the Obsidian Web Clipper (recommended)
Save all content into:
🔧 (Recommended) Set Up Web Clipper Location
To make this automatic:
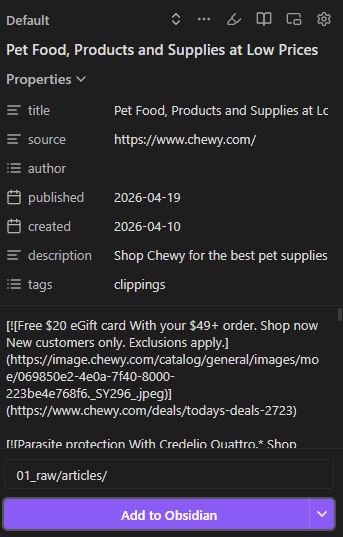
Click the Obsidian Web Clipper icon in your browser
Click the ⚙️ Settings icon
Go to Templates
Click on Default
Find “Note location”
Change it to:
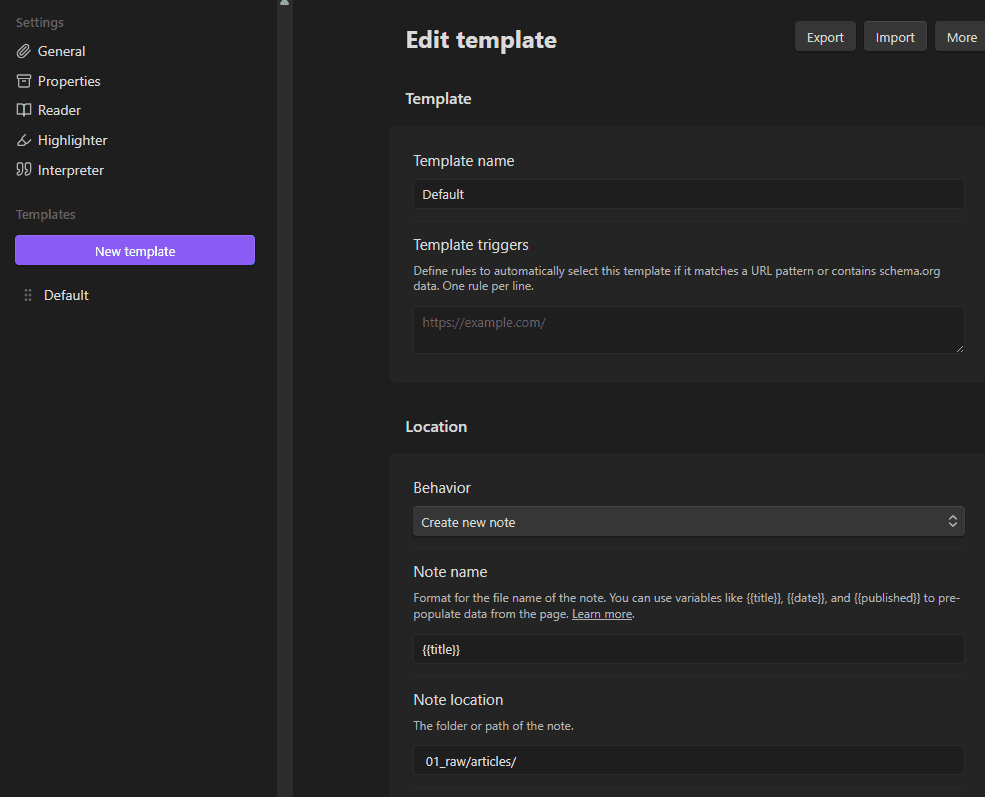
✅ Now every time you clip an article, it will go directly into the correct folder.
🧠 Why This Matters
This ensures:
all your sources go to the right place
Codex can process them easily
your system stays clean and consistent
🧠 When to Use Each Raw Folder
Most of the time, you will use articles.
Use the other folders only in specific situations:
📄 articles (default)
Use this for:
web pages
KB articles
SOPs
internal documentation
👉 If you’re unsure, put it here
📝 notes
Use this for:
your own notes
meeting notes
SME conversations
copied Slack messages
👉 Anything created by you or your team
🖼️ images
Use this for:
screenshots
diagrams
visual references
📚 papers (rare)
Use this for:
research papers
long-form reports
💻 repos (rare)
Use this for:
code repositories
technical documentation tied to code
💡 Simple Rule
Web content → articles
Your thinking → notes
Visuals → images
Everything else is optional.
💡 Tip
Don’t overthink what you add.
Start with:
3 to 10 articles
anything relevant to your course or topic
Step 8: Process Sources
👉 Paste into Codex:
🧠 Phase 3: Build Understanding
Step 9: Generate Concepts
👉 Paste into Codex:
Step 10: Generate Entities
👉 Paste into Codex:
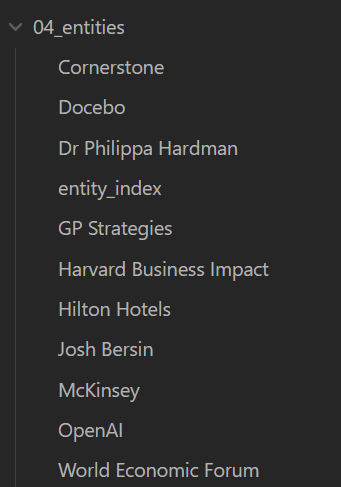
🧠 What Are Entities?
Entities are the real-world things in your knowledge base.
Examples:
tools
systems
teams
policies
products
💡 Why They Matter
Entities help Codex connect ideas to real-world context, which makes answers more grounded and useful.
⚠️ Keep It Simple
You do not need to think too hard about this step.
Codex will handle most of it automatically.
🧠 Phase 4: Start a Project (CRITICAL STEP)
⚠️ This example is written for instructional design, but this applies to any role or project.
🧠 What You’re Doing
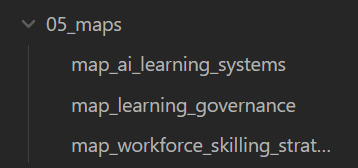
You are creating a Map
A map is:
your project workspace
the boundary for AI thinking
how you keep everything organized
💡 Examples by Role
Instructional Design
Customer Service / Ops
Leadership / Strategy
🧠 The Rule
Every project gets its own map.
Step 11: Create Your Map
👉 Paste into Codex:
Step 12: Create Output Folder for This Project
👉 Paste into Codex:
🧠 Why this step matters
This keeps all your answers organized from the start, instead of cleaning things up later.
Step 13: Strengthen Your Map (Recommended)
👉 Paste into Codex:
This step strengthens your map by explicitly connecting it to relevant sources and concepts. While the system can work without this, doing this improves the quality and focus of your answers.
🧠 Why Maps Are So Important
Without a map
The AI will:
search across your entire vault
mix unrelated topics
pull in irrelevant information
👉 Your answers may feel:
too broad
unfocused
less useful
With a map
The AI will:
focus only on knowledge connected to that map
ignore unrelated content
stay aligned to your project
👉 Your answers become:
focused
relevant
immediately usable
💡 Simple way to think about it
Without a map = searching your entire brain
With a map = working inside a specific workspace
🧠 One-line takeaway
A map controls what the AI thinks with, so your answers stay focused on your project.
🧠 Phase 5: Ask Questions (Where the Magic Happens)
Step 14: Generate Your First Answer
👉 Paste into Codex:
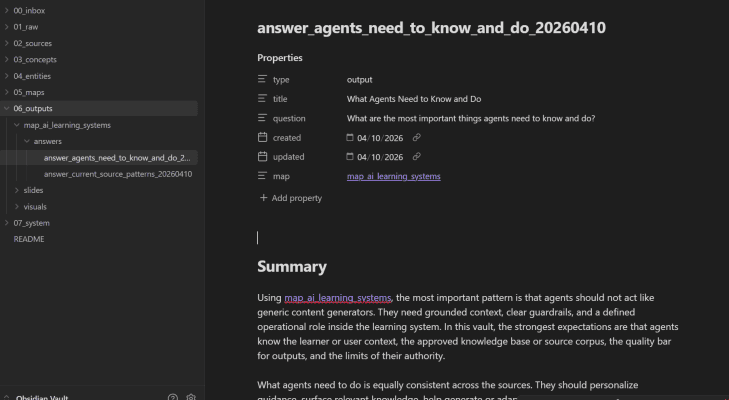
🧠 What’s Happening Behind the Scenes
When you ask a question, Codex:
Reads sources (facts)
Uses concepts (patterns)
References entities (context)
Follows the map (scope)
Then:
👉 writes a structured answer back into your vault
🔥 High-Value Questions You Could Use
Training Design
Using [[map_<course_name>]], what should agents learn?
Mistakes
Using [[map_<course_name>]], what mistakes will agents make?
Scenarios
Using [[map_<course_name>]], what scenarios should agents practice?
Learning Objectives
Using [[map_<course_name>]], what should the learning objectives be?
Gaps
Using [[map_<course_name>]], what is missing or unclear?
🚀 Streamline the Process Once You Understand It
Now that you understand how the system works, you do not need to repeat every step manually for every new project.
Once your vault is set up, your workflow can be much simpler:
Add source material to 01_raw/articles/
Choose a project name
Paste one prompt into Codex
Let Codex prepare everything for you
Start asking questions
🧠 What This Streamlined Workflow Does
Instead of manually:
processing sources
generating concepts
creating a map
creating output folders
connecting knowledge to the map
You can have Codex do all of it in one pass.
This is the fastest way to go from:
👉 raw articles
to
👉 a project that is ready for focused question-answering
✅ Best Time to Use This
Use this workflow when:
your vault is already set up
you understand the basic structure
you are starting a new project
the raw content you added is mostly related to one topic
⚠️ Important Note
This works best when the content you add to 01_raw/articles/ is mostly for the same project.
If you add a mix of unrelated content, Codex can still process it, but the project map may be less focused.
Best practice:
Add a batch of related source material for one project, then run the prompt.
🔧 Codex Mega Prompt for Future Projects
Paste this into Codex and replace the placeholder before running it.
🔧 How to Use This Prompt
Replace this line at the top:
with your project name, for example:
Do NOT manually update the rest of the prompt.
Codex will use this project name throughout the process.
⚠️ Quick Check
After the prompt runs, quickly confirm:
your map is named correctly (e.g., map_bird_course)
your output folder is correct (e.g., 06_outputs/bird_course/)
If anything looks off, you can fix it manually or rerun the prompt.
🧠 What This Prompt Does
This prompt will:
create your project map
create your output folders
process new sources
generate concepts
connect everything together
👉 So your project is ready for question-answering immediately
🚀 Paste This Into Codex
💡Example
If your project is called:
Then replace:
with:
This will allow Codex to prepare:
[[map_bird_course]]
06_outputs/bird_course/answers/
relevant sources
relevant concepts
a project structure ready for questions
✅ What You Do Next
Once Codex finishes, you can immediately ask questions like:
🧠 Final Takeaway
Once your system is set up, most projects follow the same flow:
👉 add sources
👉 run one prompt
👉 ask better questions
🧠 What This Actually Is
You are not:
❌ asking AI random questions
You are:
✅ building a system that stores knowledge, connects ideas, and answers better over time
🧠 One-Line Value
This turns your research into a system that helps you design training faster and smarter.
If you have any questions or ideas on how to improve this, feel free to reach out. This is an evolving system and your feedback helps make it better.